Tutorial: DTM plugin for Grasshopper
This Tutorial explaines how DTM can be used.
Project Site: DTM
Download: DTM 0.5
Sources:
The Plugin reads Ascii (Esri Grid) and XYZ files from these sources. Also other sources may work, altough just these were tested. We'd be happy if you report any other source, that you are using.
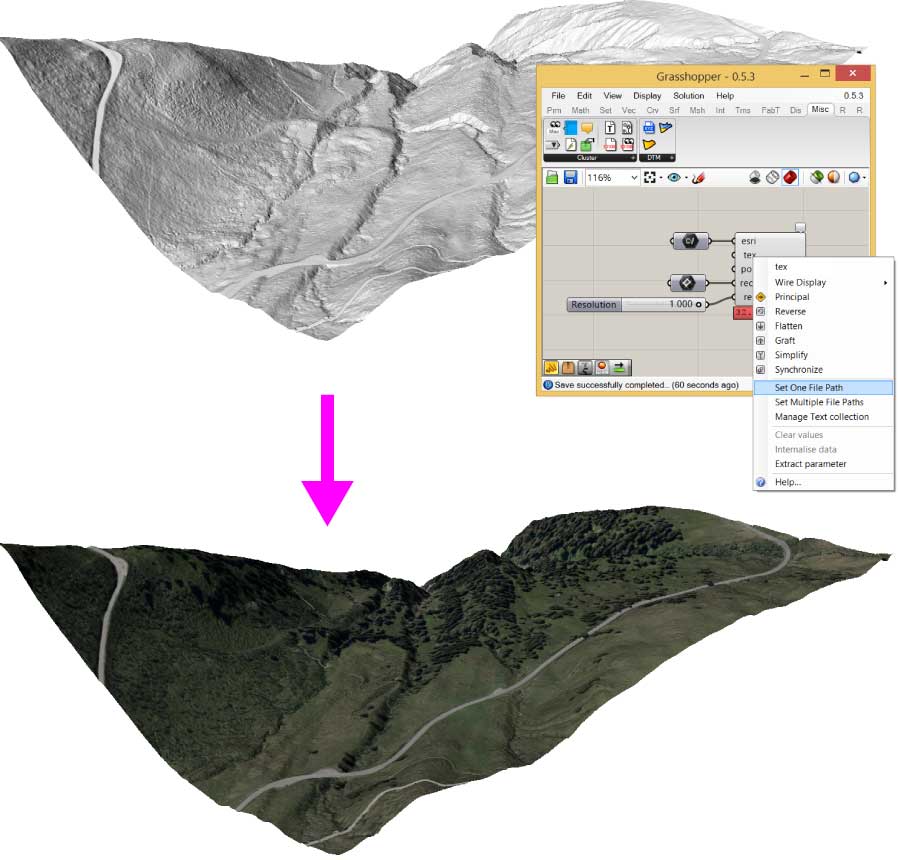
A digital terrain model will be the generated from these files and you can apply a texture by specifying a filepath. The files from Vorarlberg and South Tyrol will even automatically find the corresponding texture, if they're in the same folder.
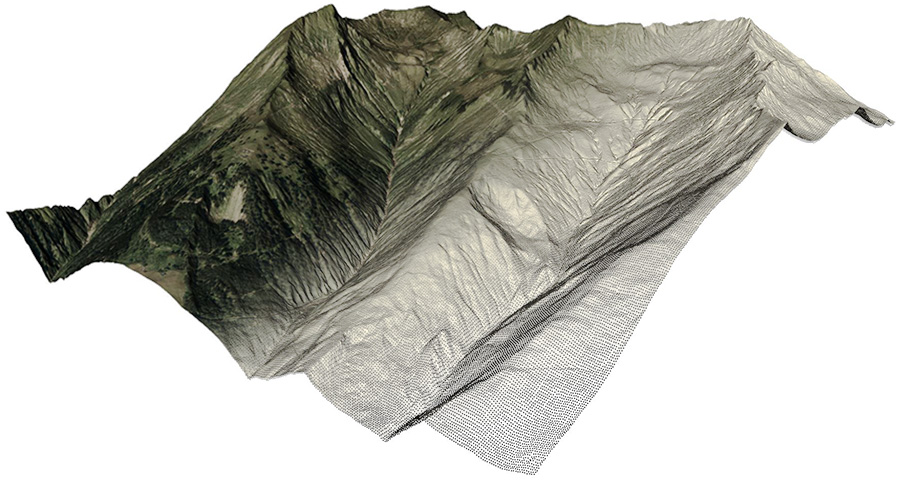
I. From an Ascii file to a textured mesh:
- Open Grasshopper and drop the component "DTM" from the Panel "Misc - DTM" to the Grasshopper window.
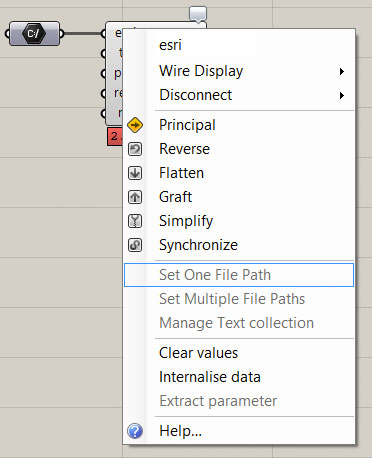
- Specify a file path on the "esri" input. Either by a "File Path" parameter or directly on the context menu of the esri input.
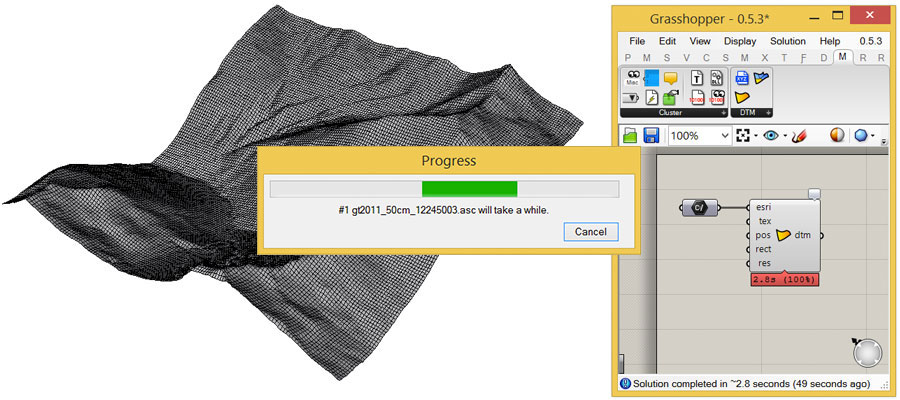
- As soon as the filepath has been specified, the calculation begins. If the calculation takes more than 1 second a progress dialog shows up. You can stop the calculation at any time by clicking on "Cancel". If the file has been read successfully a preview mesh with max. 20k Vertices is visible. You may zoom out, if the mesh isn't on the screen.
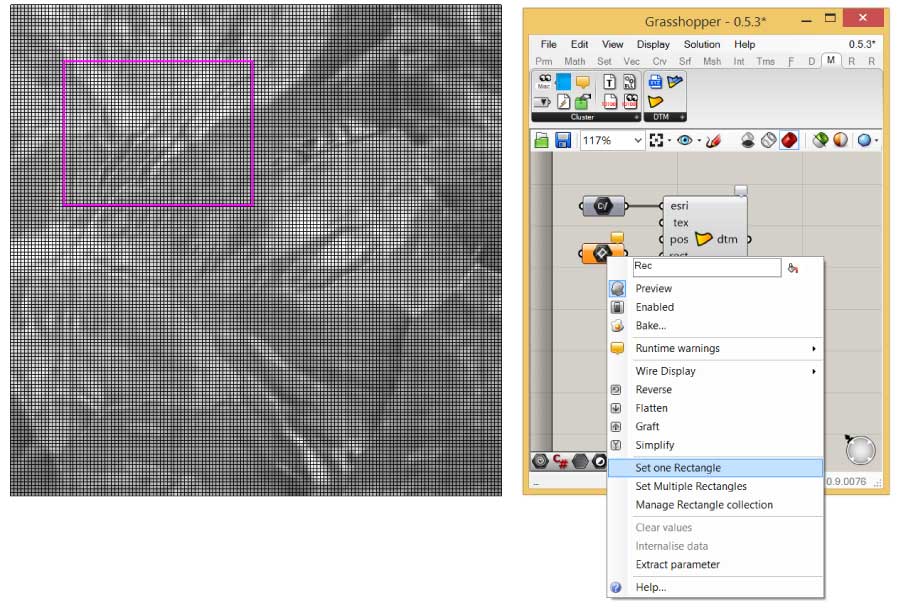
- Now you can specify a rectangle on the input "rec" to reduce the area of the dtm mesh, which allows then to increase the resolution without computational speed loss.
- If you want to get more than 20k vertices you can connect a slider on the "res" input. A resolution of 1 will ouput a mesh with all vertices of the esri file. 0 resolution will output 9 vertices. CAUTION: If the resolution is quite high the calculation may take a while. You can cancel the progress at anytime though.
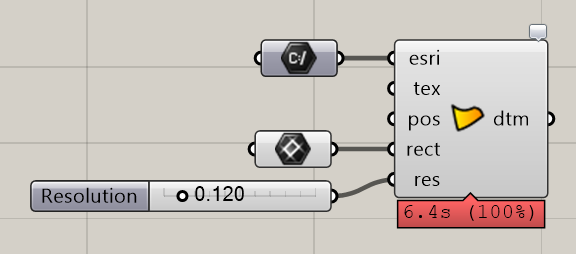
- At the input "tex" can be set a file path to a texture image. This image will be automatically mapped to the terrain model.
- To bake the DTM mesh with the texture use the component "Stitch & Bake with Texture" (see next chapter).
TIP:
By clicking on the little bulb on the top right of the component, you can find useful information about the esri file and the dtm mesh.
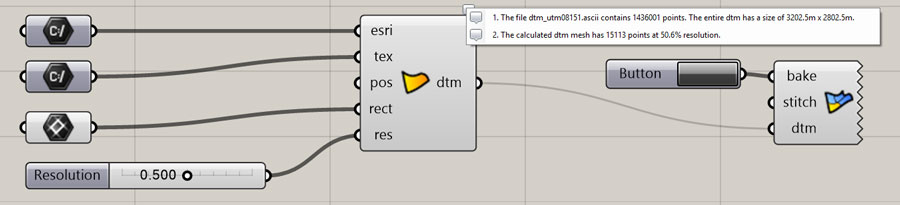
II. Stitch and bake of multiple dtm meshes:
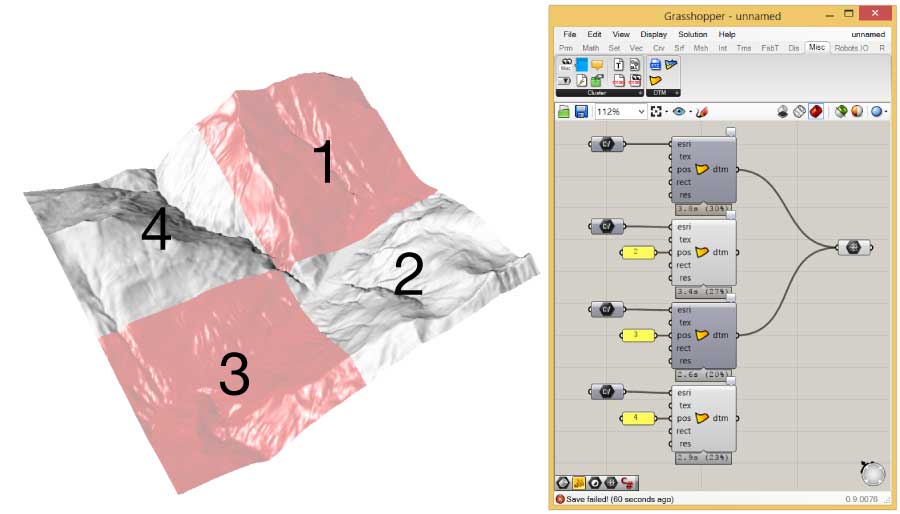
Up to 4 dtm meshes can be merged at one time. The mesh will be joined into 1 mesh and a combined texture will be generated for the new mesh.
- Repeat the steps from chapter I several times and define the positioning for each dtm mesh considering the following order:
- Drag and drop the component "Stitch & Bake with Texture" component from the Panel "Misc - DTM" to the Grasshopper window.
- Connect a "button" component to the "bake" input.
- Connect all the dtm meshes from the dtm components to the input "dtm" (by pressing the shift key more than 1 connection per input is possible).
- If you want to get a unified mesh and apply a combined texture to it, you can simply set "True" to the "stitch" input. (You may use a BooleanToggle component to do so.)

CAUTION:
If the "stitch" option is set to true, the calculation time is highly influenced by the texture's resolutions. To speed up the process you may reduce the resolution with e.g. Photoshop batch processing, before using them with the DTM plugin.
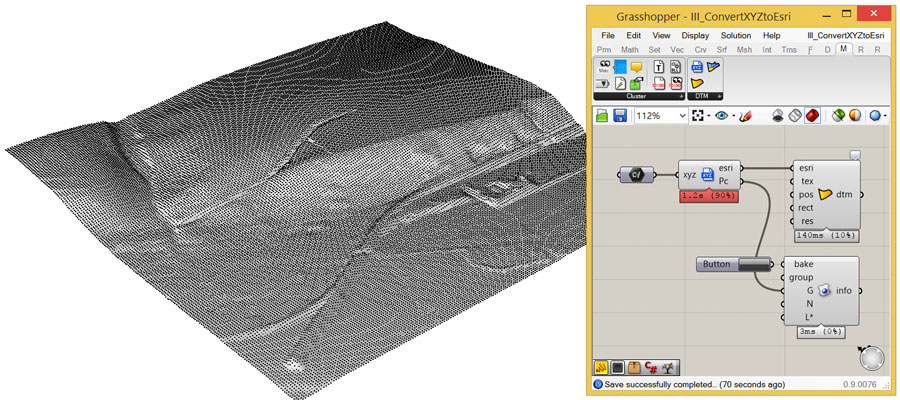
III. Convert XYZ to esri files:
XYZ files are is a rare method to store grid models, but with the DTM plugin you can convert XYZ files to esri and subsequently create dtm meshes from it. XYZ files can contain non grid point clouds, in that case the "Convert XYZ To Esri" component will throw an error.
- Drag and drop the component "Convet XYZ To Esri" component from the Panel "Misc - DTM" on the Grasshopper window.
- Specify a file path to an xyz file on the "xyz" input.
- If no error shows up, the path to the resulting esri file will be output on the "esri" output.
If the XYZ file is not a grid and the conversion failes, still the point cloud from the xyz file will be output on "Pc". Use the "Advanced Bake" component from "FabTools" to bake the point cloud to rhino.
TIP:
The resulting esri file is located in the user temporary folder. You can copy the file if you navigate to the temporary file path from the "esri" output.
IV. Tutorial Files:
To get the idea of how DTM plugin works, you can download the files used in this tutorial.
Download Tutorial Files
V. Clean Script (optional)
If you're using ascii data from which can't be handled by the DTM tools, you propably want to clean the file before you retry. To do so simply download this Python script and run it in Rhinoceros or any other Python IDE.
Download Clean Script
This is how it works in Rhinoceros:
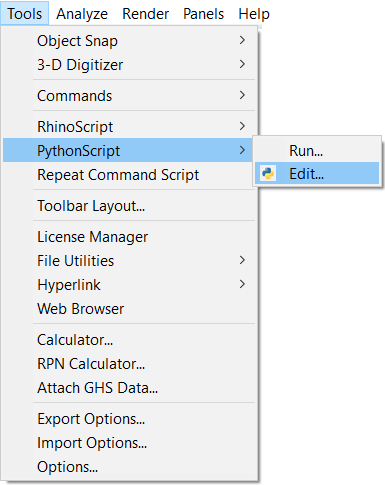
- Open Rhinoceros and go click on "Tools - Python Script - Edit...", to open the Rhino Python Editor.
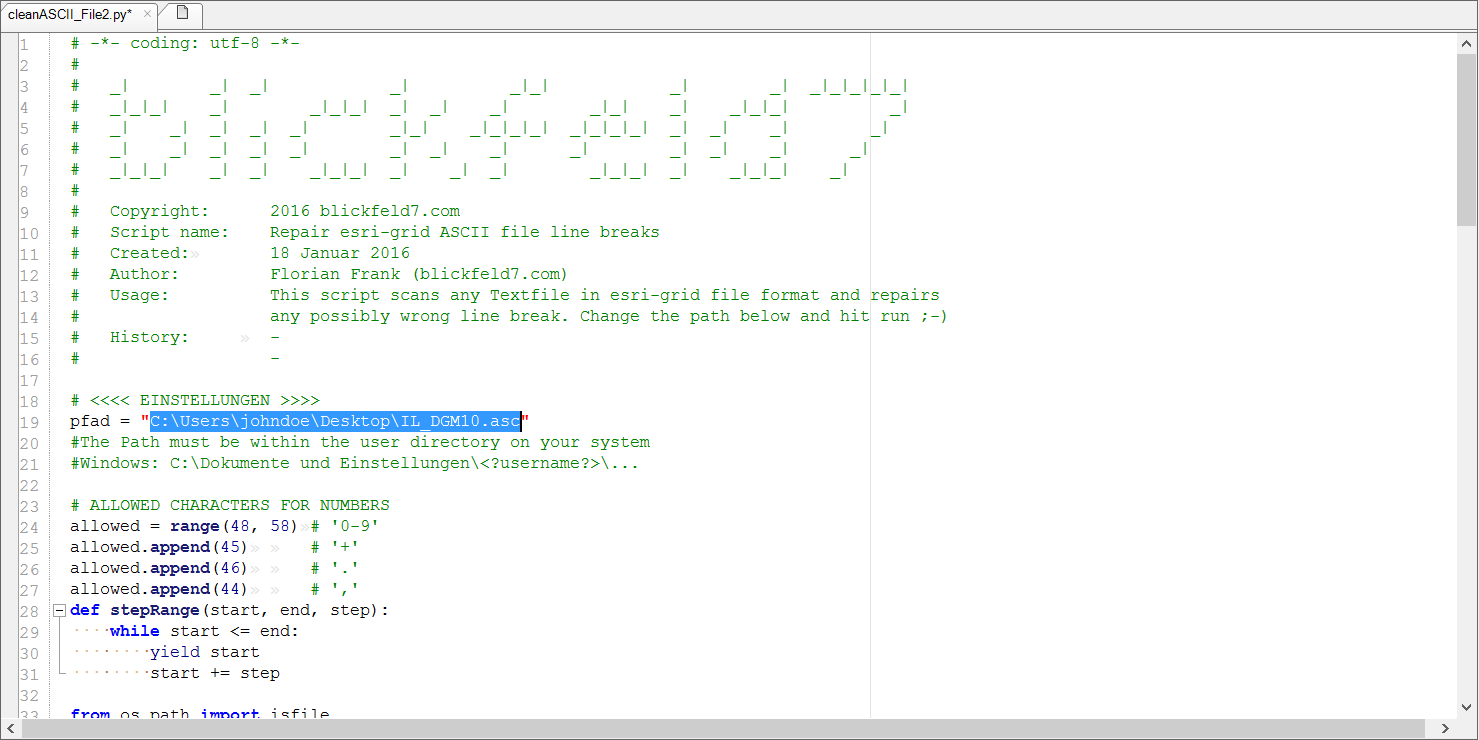
- Click on "File - Open" and browse to the "cleanASCII_File2.py".
- Then replace the highlighted path in the following image with the path to your file, which sould be cleaned.
- The script can run some minutes, this depends on your machine. If the cleaning was successful you should obtain a file with the ending _bf7. Now you can try the steps from this tutorial with this new file.

Stefan Kainzwaldner
E-Mail: stefan@blickfeld7.com
Austria: +43 680 1226950